By submitting this form, you agree to receive recurring automated promotional and personalized marketing text messages (e.g. cart reminders) from JBugs at the cell number used when signing up. Consent is not a condition of any purchase. Reply HELP for help and STOP to cancel. Msg frequency varies. Msg & data rates may apply. View Terms & Privacy.
Installing new door seals on your VW Beetle is essential for maintaining a proper seal, reducing wind noise, and preventing water intrusion. To ensure a professional, long-lasting fit, follow this step-by-step guide.
By following these guidelines, you can achieve a professional-quality installation that enhances your VW Beetle’s sealing performance and longevity.
Important Considerations Before You Begin:
Do not install the seal by working continuously around the door. This will stretch the rubber, leading to a misfit and potential bulging.
Clean the Body Surface: Remove any old, cracked, or rotted seal remnants from the door channel to ensure optimal adhesion.
Test-Fit Before Gluing: Before applying adhesive, dry-fit the seal to ensure proper alignment.
Step-by-Step Installation Process
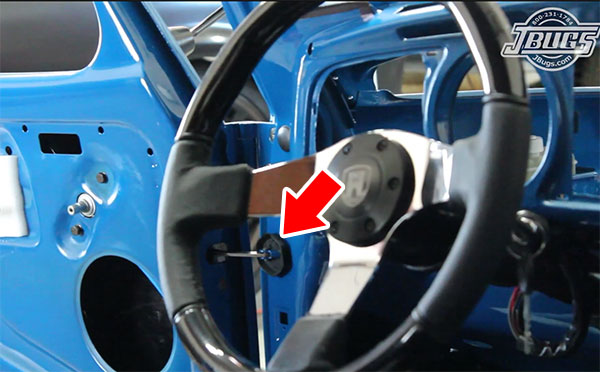
Open the door checkrod arm
Remove the circlip from the checkrod pin.
Gently tap the checkrod pin to free and open checkrod.
The door seal will install behind checkrod arm.
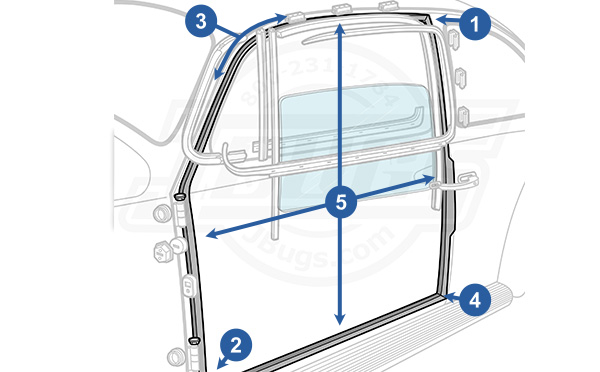
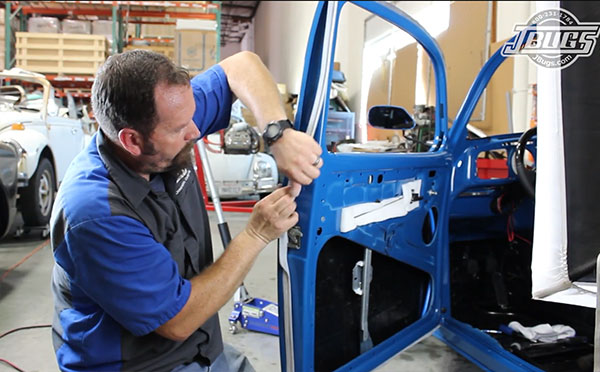
Position the Corners First
Begin by inserting the door seal at the four corners of the door frame.
For best results, install the top rear and bottom front corners first.
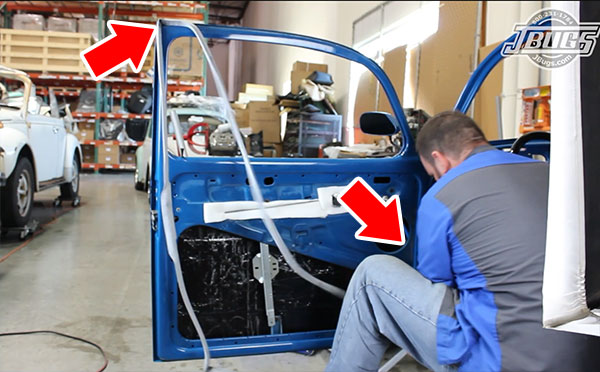
Work the Seal Between the Corners
Once the corners are secure, gradually fit the seal along the edges between them.
Gently pull the rubber to thin it slightly before pressing it into the channel to ensure a snug fit.
Avoid stretching the seal too much, as this can lead to excess material at the end of the installation.
Use a Trim Tool for Final Adjustments
A trim tool can be helpful for pressing the seal firmly into place and ensuring it sits properly in the channel.
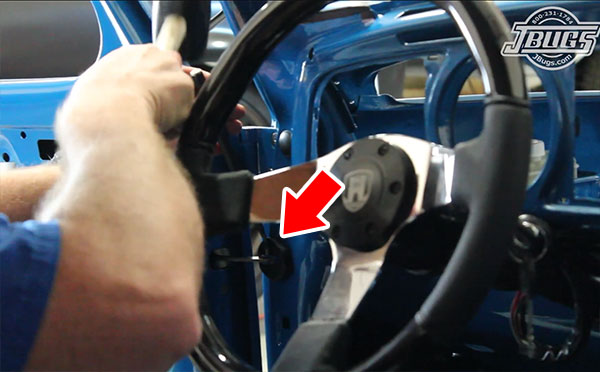
Check Rod Reattachment
Once the seal is in place past the door check rod, reattach the check rod to the body mount using a pin and secure it with the clip.
Back Section Installation
When installing the back portion of the door seal, stretch it slightly to fit behind the door latch before securing the remaining top and bottom sections.
Adhesive Application (If Used)
If using weatherstrip adhesive, first install the seal completely, then glue it in sections to avoid mess and misalignment.
Follow the adhesive manufacturer’s recommended dry-time for proper curing.
We recommend 3M™ Black Super Weatherstrip Adhesive.
German Door Seal Considerations:
German-manufactured seals have a powdery gray coating that helps them break in over time.
Do not wash or scrub off this coating, as it facilitates the wear-in process.
Due to their airtight design, new seals may initially make doors harder to close. Rolling the windows down slightly during installation can help alleviate pressure and ease door closure during the break-in period.

 5-Star Rating!
